
 If you want your virtual meetings to get off to a good start, set yourself up for success by running through a prep session to make sure everything is in working order. Learn how to test your microphone so you can have a crystal clear online meeting.
But first, let’s run through a few other things.
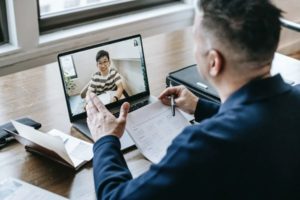
To be able to use technology to attend meetings outside of the office, tour a new location in a different country, unite with our peers overseas and more comes with its advantages, and at times, disadvantages.
It can get frustrating when technology decides to get glitchy or not work when it’s supposed to. Poor connection, improper use of software and not practicing before you go live can be problematic. Instead, lead a meeting free of frustration when you go through a few preparation basics (including how to test your microphone) before you go live:
1. Send Out Invitations To All Participants
It would be a shame if you had your presentation and meeting all set up, but no one showed up, or the people who needed to show up couldn’t because they didn’t receive the information required to join in. Ensure all attendees have what they need to be present: The time, date and meeting details are the basics, but think about anything else that might be helpful like the meeting agenda, a rundown of who’s who depending on the size of the online meeting, etc.
 2. Do A Trial Run
Especially with an important client or new business development opportunity, see how your virtual presentation flows by running through it beforehand. Send out the link to a colleague and ask them to join in and take notes. This way, you can see where your slides need to be improved or worked on and you can get a feel for the video conferencing platform for navigation and pacing.
3. Test Equipment
One of the most important pre-meeting tasks you can do is test your equipment. Try it out days before your meeting and (or) try it just just moments before you’re live. In fact, remind participants in an email to check their equipment to make sure everything is running properly on their side as well. Latency delays and video that cuts out just because of a poor internet connection makes for an unproductive online meeting – plus, it’s frustrating when your audio and video isn’t up to par! Check your bandwidth and request that others check theirs too for the smoothest experience possible.
When choosing a video conferencing platform for your needs, stay on the lookout for a Call Diagnostic Test that shows you how you test your mic and other functions. This small but mighty feature is especially helpful when checking your audio and video and can usually be found in Settings when your video conferencing feature is open.
After selecting your Meeting Mode, (Conversation/Collaboration Mode, Q&A Classroom Mode or Presentation/Webinar Mode), the Call Diagnostic Testing tool will pop up and run a few diagnostics for you:
- Microphone
This will prompt you to check your microphone by speaking into it while watching to see if the bars move. - Audio Playback
There’s an audio playback prompt where a piece of music will play and ask if you can hear the audio from your speakers. - Audio Input
Determine if the audio is coming in and out of the microphone. If you speak into your mic, can you hear your voice playing back? If you hear an echo during a meeting, another participant’s speakers may be too loud. - Connection Speed
This function will check your connection speed in real time for audio and video conferencing to determine how many Mbps you’re capable of downloading and uploading.  Video
Video
Can you see your video feed? This will test your camera to see whether or not you’re able to view a moving image.
At any point during an online meeting, you can access Settings and test your microphone. There’s no need to run a diagnostics test every time, although, for peace of mind and assurance, it doesn’t hurt to do so at the beginning before the meeting starts. If at any point during the virtual meeting you’re not sure what’s going on with your mic or a participant is experiencing trouble with theirs, it’s usually a quick fix and a simple click to get back on track.
Here’s how to test your microphone:
- Select the Settings cog on the right toolbar.
- Select Audio/Video tab.
- Click the dropdown menu below Audio Settings.
- Select one of the following:
- Default – External Microphone (Built-in)
- External Microphone (Built-in)
- ZoomAudioDevice (Virtual)
- Click Play Test Sound to see if your mic is picking up on it
One more pro-tip: Consider opening up your meeting room early before any video chat or conference call to allow participants to show up and get settled. You never know who may or may not have experience with technology, so this allows for a few moments for people to get settled in and test their connection. If they’re running into technical difficulties, they can run a Call Diagnostic Test or try a little troubleshooting on their own.
With Callbridge, you can make the most out of your online meetings with video conferencing technology that supports how you connect with customers, clients and employees. In whatever capacity or industry you use video conferencing, experience how Callbridge makes a difference with high quality audio and video capabilities.